All images in this post are copyright © Rebekah Loper and are not to be used elsewhere without permission.
This post contains affiliate links.
If I roast a chicken, my husband inevitably asks at some point in the evening if we’re having soup the next day. 99% of the time, my answer is yes. It’s a good use of leftovers, and it’s so good for you.
I also have chicken soup on my mind lately because I had a cold last week, and I was pretty much counting down the time until I had the energy to make my from-scratch chicken soup. And when I finally could, let me tell you that every swallow I took was heavenly. It was so soothing going down.
Roasted chicken the night before was a nice treat, too.
And, well, roasted chicken is where this all starts.
The recipe I’ve developed has pretty much been 5 years of trial and error and figuring out exactly how I liked things. There is one thing that you should know though:
Your broth is only as good as your chicken.
I’ve mostly tried three different ‘brands’ of chicken – Tyson (at Aldi in Oklahoma it’s less than $1/lb which makes it the most economical), Sprouts, and Kirkwood’s Never Any! whole chickens (also at Aldi, for about $1.50/lb).
My favorite, by far, is the Kirkwood Never Any! chicken. It’s decently priced for my budget, and is more humanly raised than standard commercial poultry, and also tastes really good. Tyson has more added liquid, and has some scary practices in general, but is comparable taste-wise. For some reason, every whole chicken I’ve bought from Sprouts and made broth out of has tasted bitter. So I, personally, avoid those, and it’s also the most expensive of the bunch. Even on sale, the lowest I’ve seen it priced at is $1.69/lb.
If you don’t know how to roast a chicken, the simplest way to do it is like so:
You will need:
- a whole chicken (usually found under the guise of ‘whole fryers’ at the grocery store)
- some olive oil
- some salt (Kosher salt or Pink Himalayan salt is preferred, but regular table salt will do if that’s all you have on hand. At this point, it’s literally just for flavor)
Preheat your oven to 400 degrees Fahrenheit.
Remove chicken from package, and check in the body cavity (that hole between the legs that you can see in the picture) and see if you got the goody bag (ie: the innards), and remove it if so. If you’ve never worked with a whole chicken before, this will usually be a little paper-type bag stuffed full of random parts. Usually, those parts are the neck (which you can save to use for the broth later, though I usually don’t because I forget that it’s in the fridge), the gizzard, the liver, and sometimes the heart. These things are edible, but if you don’t want to eat them, I don’t blame you. It’s about a 50/50 chance these days of whether you get the innards at all, though.
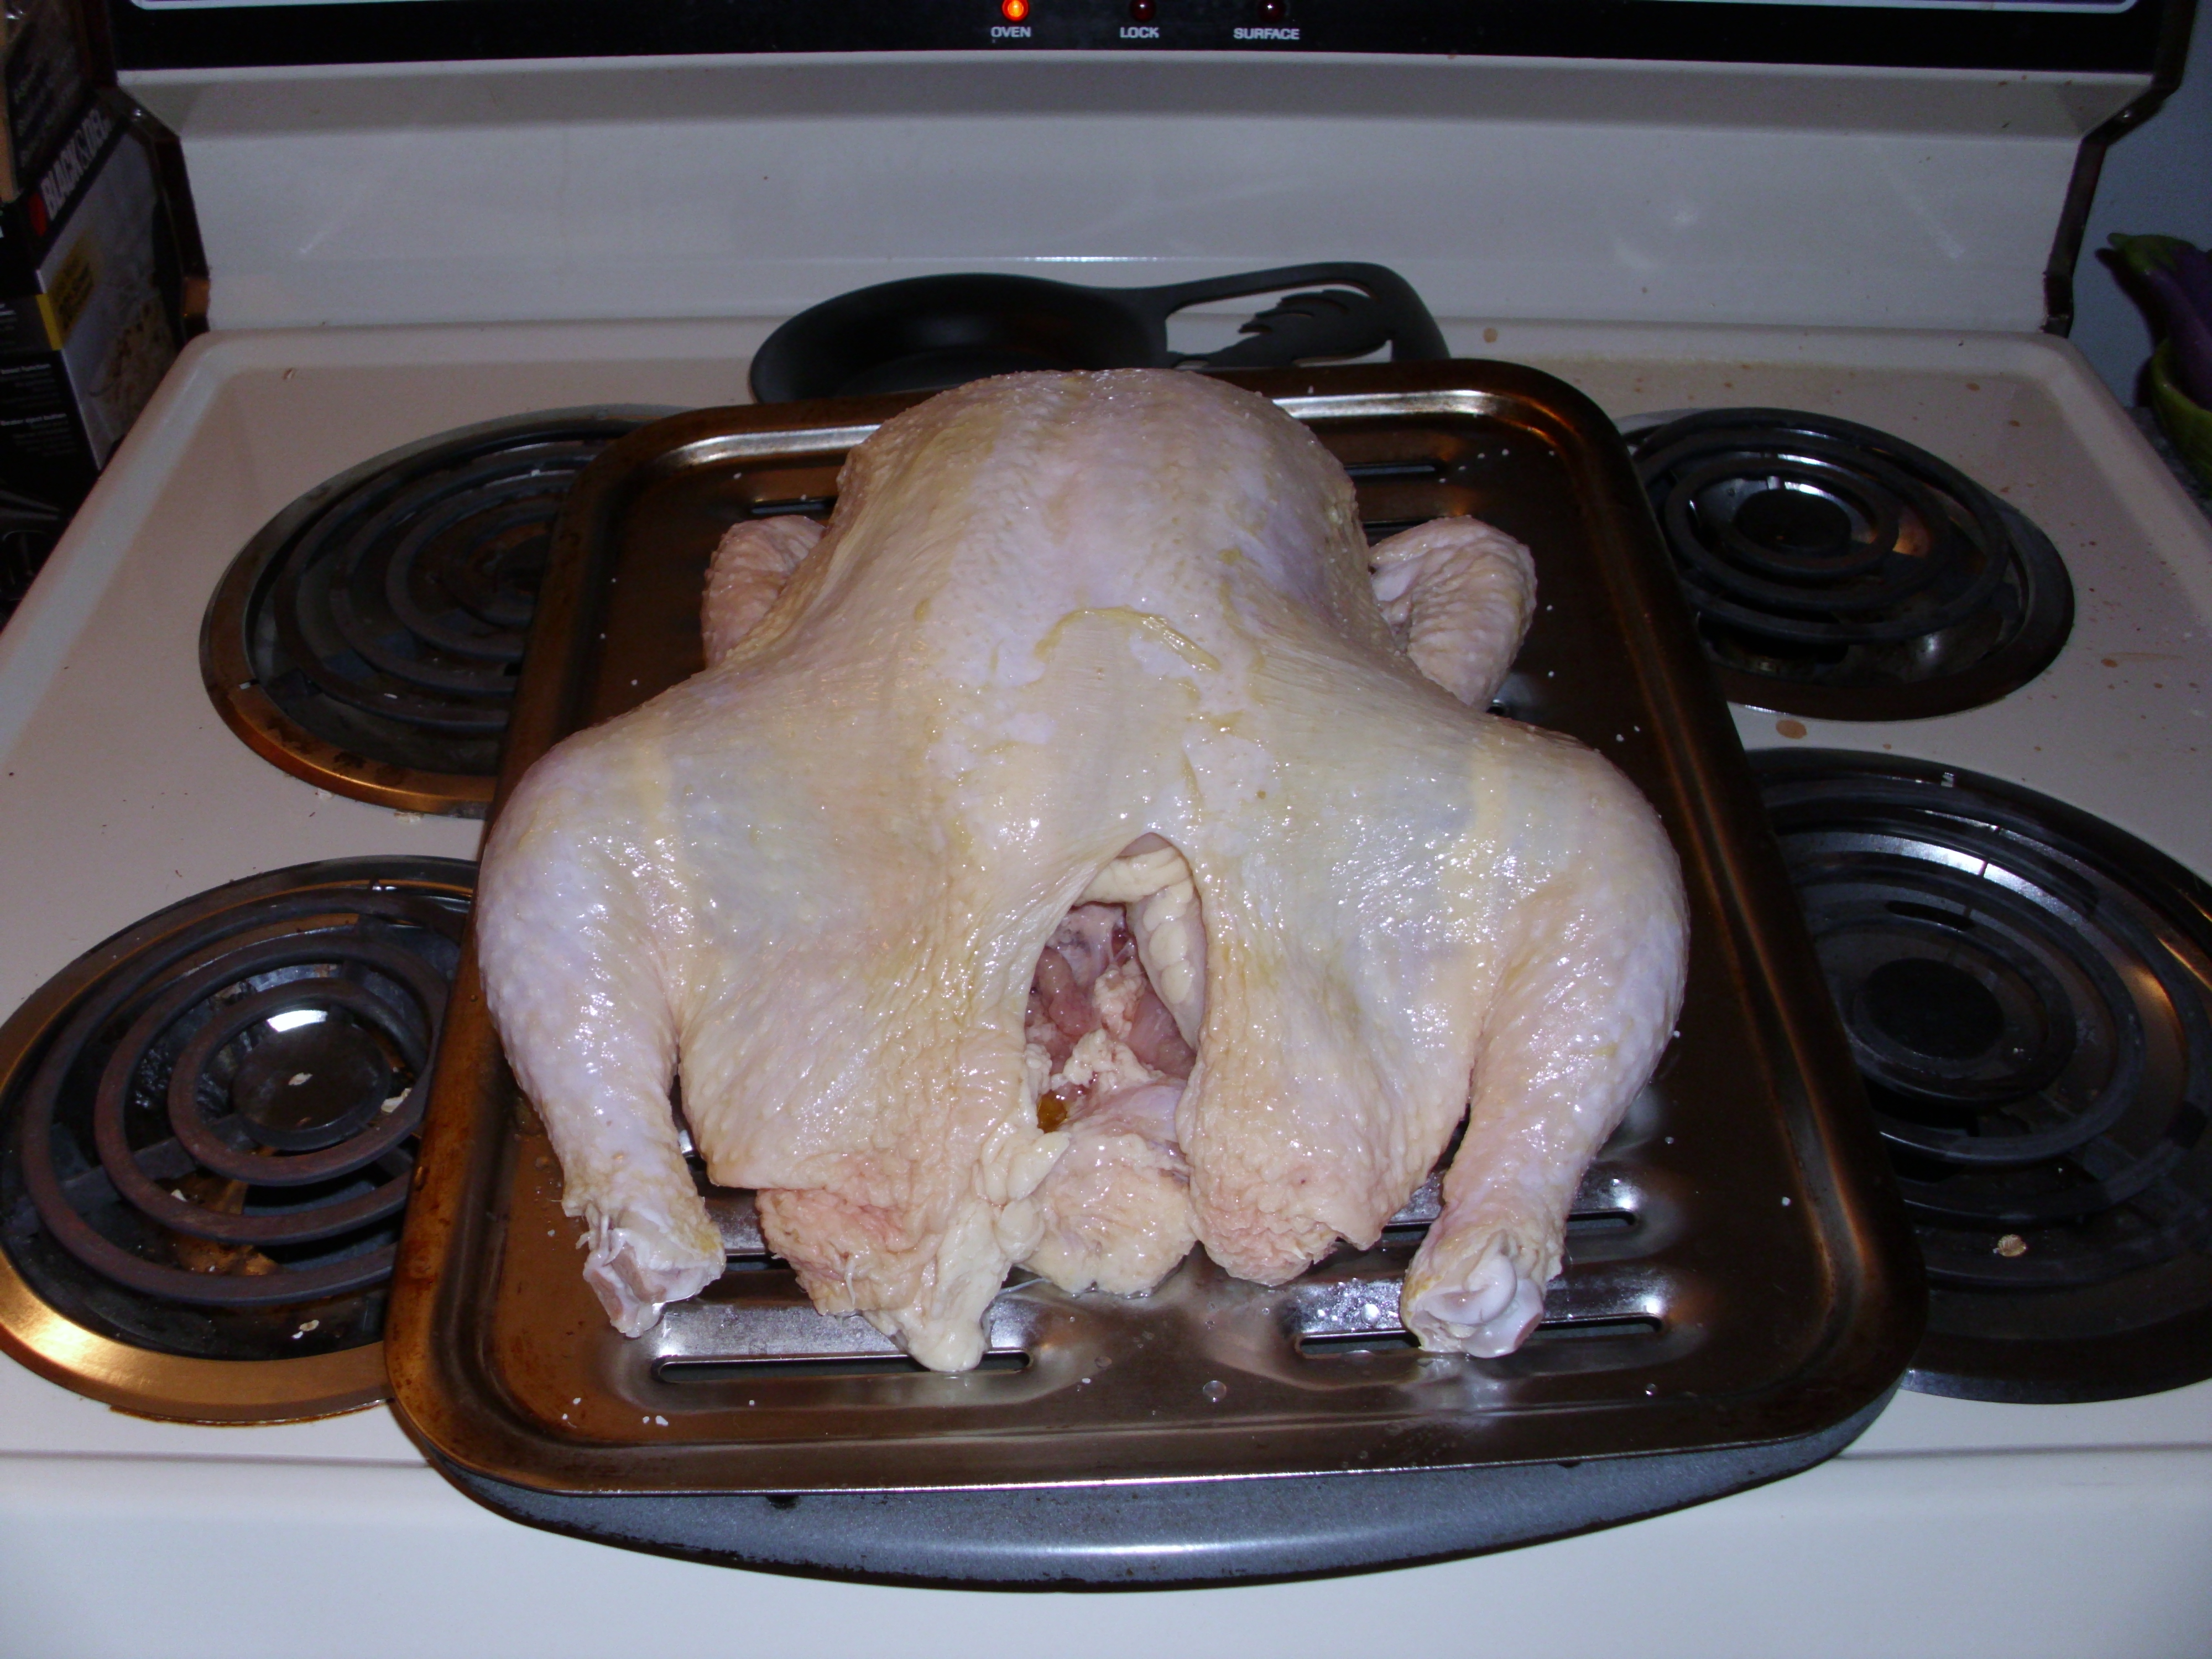
Rinse the chicken under cool, running water, making sure to get inside the body cavity. Pat skin dry with paper towels. Some people say that rinsing it is unnecessary, but since 99% of the time whole chickens are packaged in tight-fitting plastic and have been literally stewing in their raw juices for a while, I prefer to rinse them. It also gives me the chance to pluck any large quills that were missed when the chickens were processed (don’t worry about little, downy feathers, you won’t even be able to find them after the chicken is cooked), and to fully check and make sure the chicken hasn’t gone bad in the time it’s been sitting in my fridge, which has often been upward of two weeks. (I don’t really recommend this, but hey… life. It’s not like it isn’t going to get cooked twice anyway.) Make sure to clean your sink thoroughly before you, say, set vegetables in it. Or clean dishes waiting to be rinsed.
Place on a roasting pan (or a lipped baking sheet with a cooling rack set in it, if you don’t have a roasting pan), belly side up (like in the photo above). Rub skin with olive oil, and sprinkle with salt. Make sure not to get too much salt at this stage. If you want to, you can tuck the chicken wings up under the back to keep them out of the way for when you carve the chicken after it has roasted.
Place in oven (if the oven isn’t quite up to temp yet, that’s okay, you can go ahead and slide it in), and roast undisturbed for at least 45 minutes. After 45 minutes, check to see if it is done. The best way to do this is with a meat thermometer stuck between the drumstick and body, into the thigh. It should be at least 165 degrees Fahrenheit. If you don’t have a meat thermometer, what you’re looking is the skin to be crisp and tightened up, the juices from the chicken to be running completely clear. If you need to, stab the skin around the thighs with a fork to get the juices to run out so you can see them. If you grab the drumstick and wiggle it up and down, it should move freely without feeling stuck or stiff. If the chicken is not done, or if the skin is not crispy enough for you, put it back in the oven for at least 10-15 minutes, and check again. Repeat as necessary.
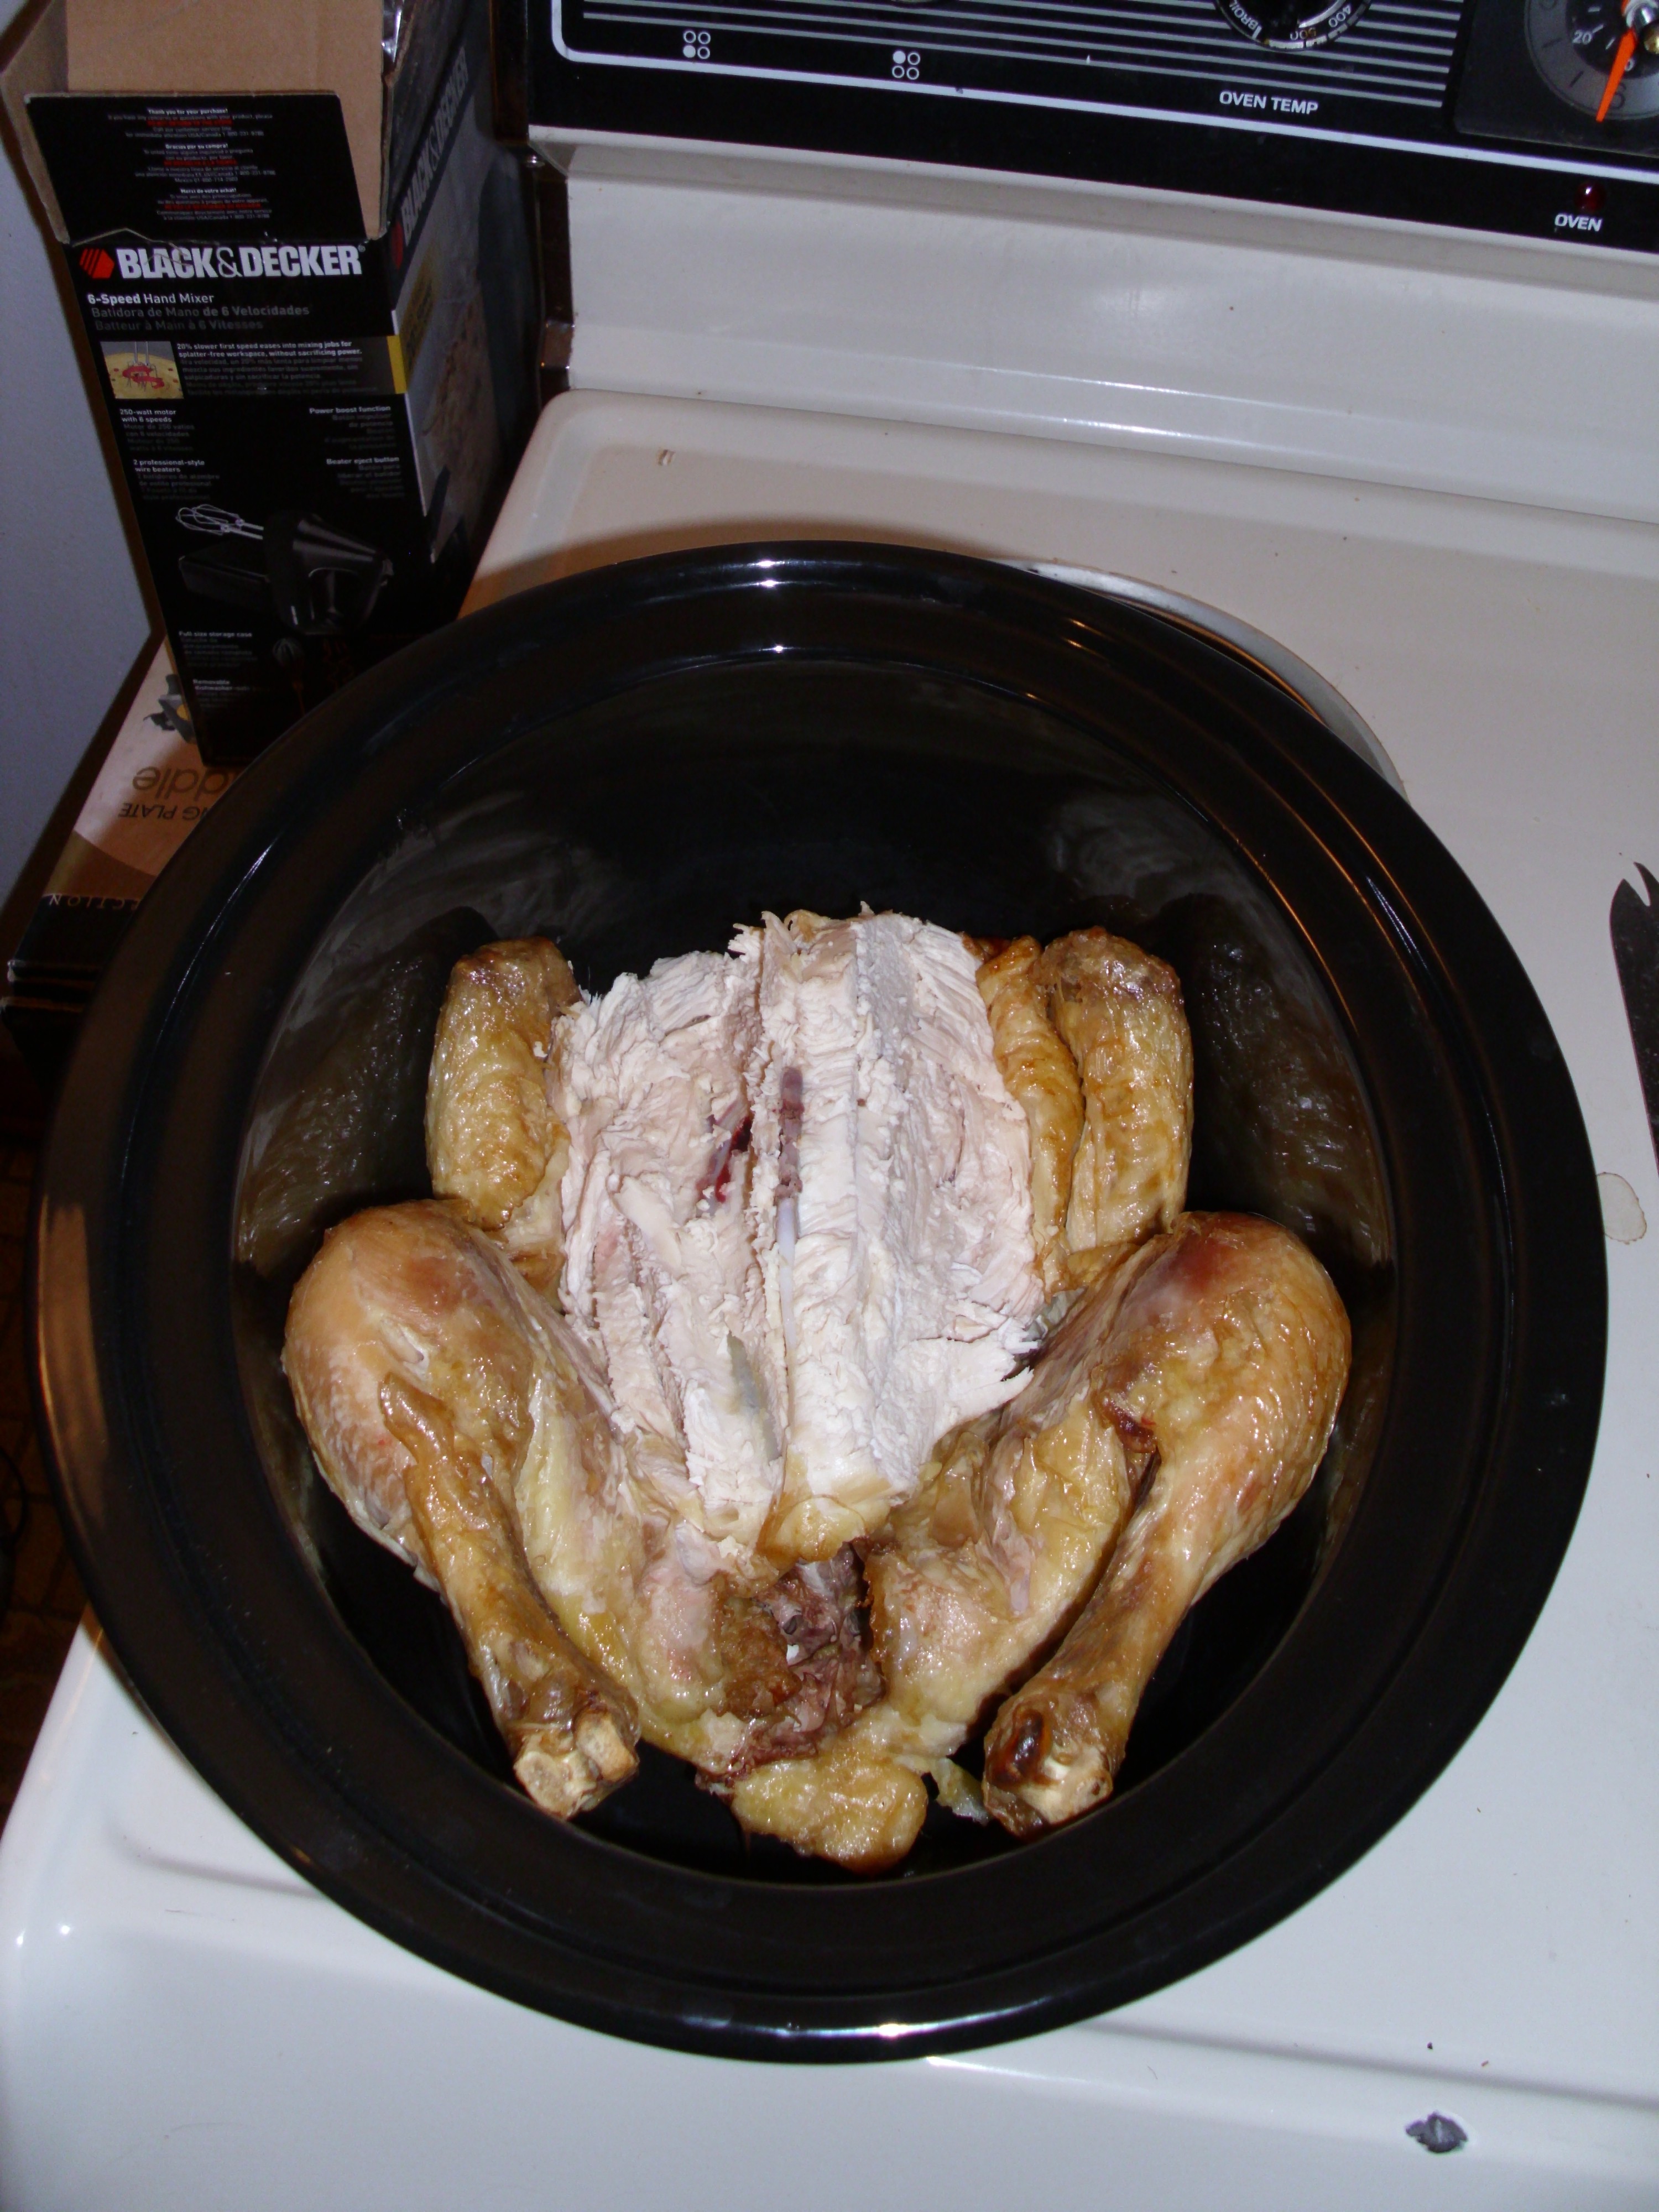
When done, pull out of oven and let rest for at least 15 minutes before carving. Feel free to peel the skin off and eat it while it’s still hot and crispy. 
Consume! Or, if you’re not planning to eat any of the chicken at this point, wait a little bit longer before you start ripping the meat off the carcass. It’s still too hot. That said, it is easiest to get more meat off while it’s still warm. It sort of… adheres to the bone as it gets cold, and becomes more difficult to tear off. Place meat in a container and refrigerate.


Now, onto the broth!
(Note that in the picture I did no remove as much meat from this particular chicken as I usually do, because I had chicken meat in the freezer to use. Normally, I strip it all – every bit of breast meat, the wings, the drumsticks, and then I flip it over and get as much meat off the back as possible, too.)
For this phase, you will need:
- Chicken carcass (bones, skin, any meat still left on the bones)
- Salt, preferably kosher or Pink Himalayan salt.
- 1-2 onions (white or yellow)
- 3-4 whole carrots
- 3-4 ribs of celery
- optional: fresh herbs. I prefer to use thyme, rosemary, and marjoram to season my broth. Parsley would be okay, too. ( Only if you have them on hand, and make sure to reserve some to use in the soup later.)
- apple cider vinegar
- water
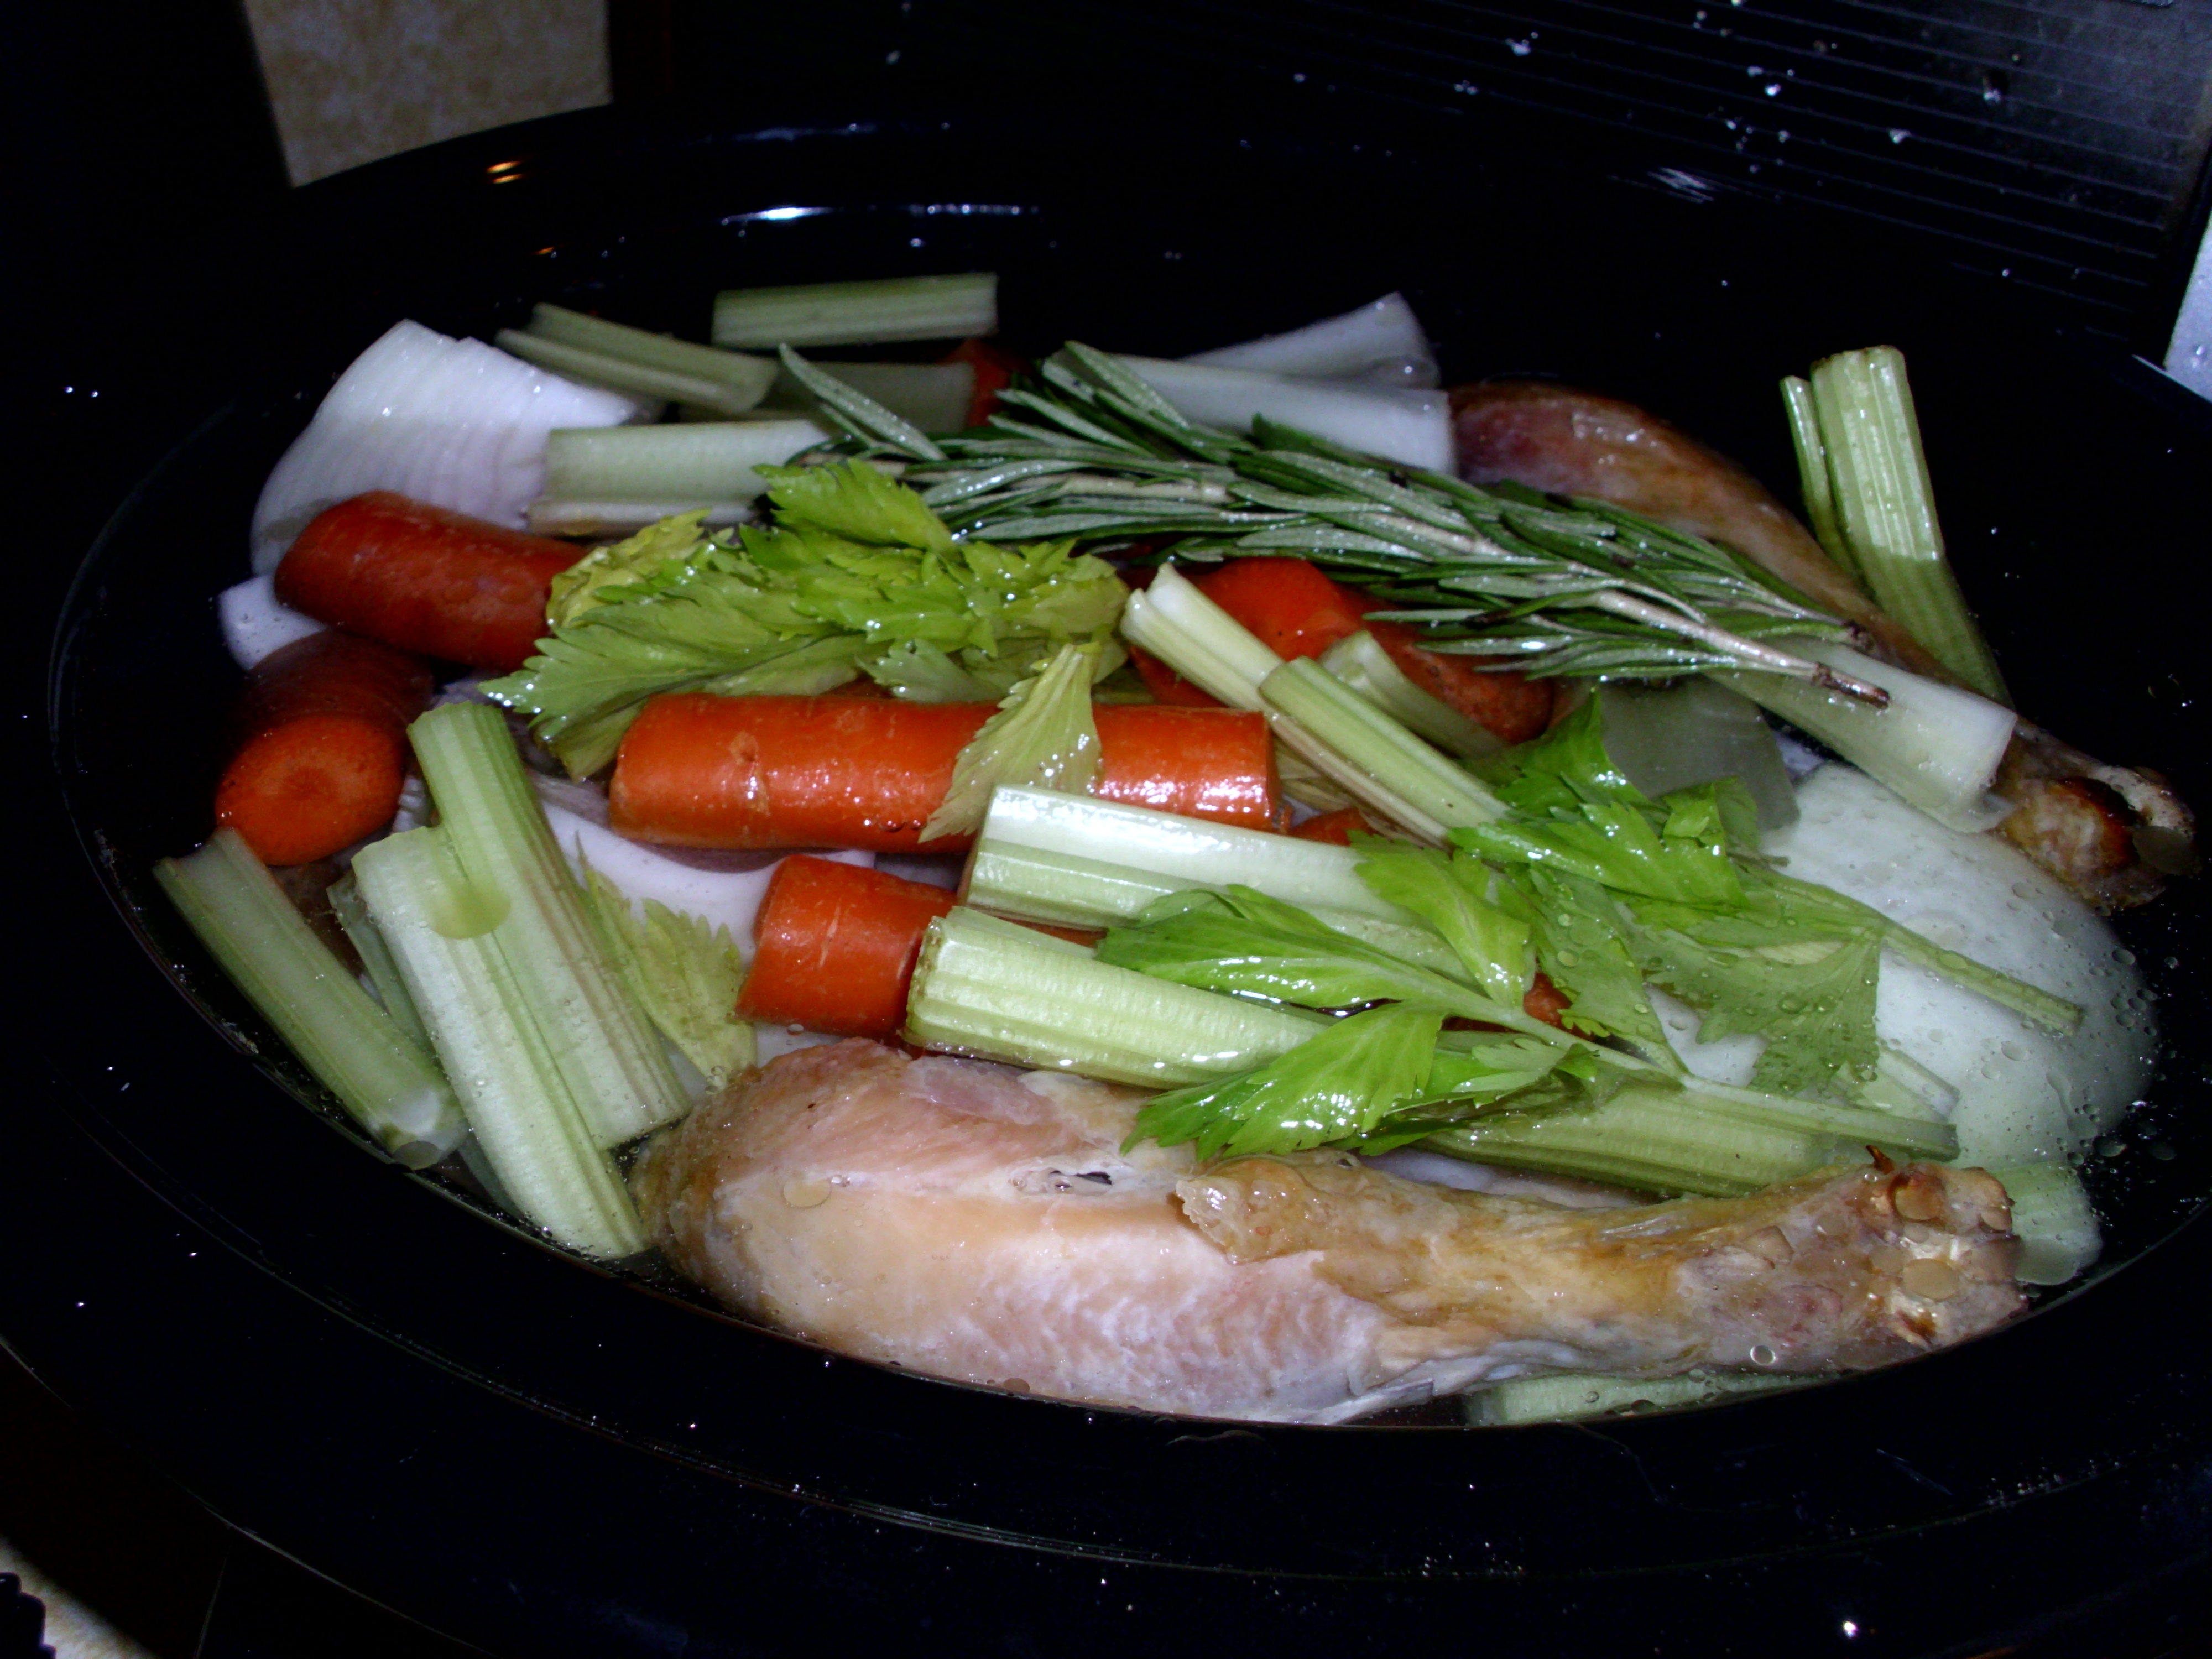
Next, you want to get your slow cooker out and dump that chicken in there – all of it, except the meat that you pulled off. If you reserved a chicken neck, you want to get that out now too and put it in there.
Don’t worry – if you don’t have a slow cooker, you can do this in a large stockpot on the stove. But only if you’re not hesitant about leaving a pot of broth simmering on your stove all night long.
Sprinkle the carcass with salt. Liberally. The salt is what’s gonna draw a lot of the flavor out of the meat, the bones, and even the veggies and help infuse it through the broth. Don’t be afraid of putting a couple of tablespoons of salt in at this point.
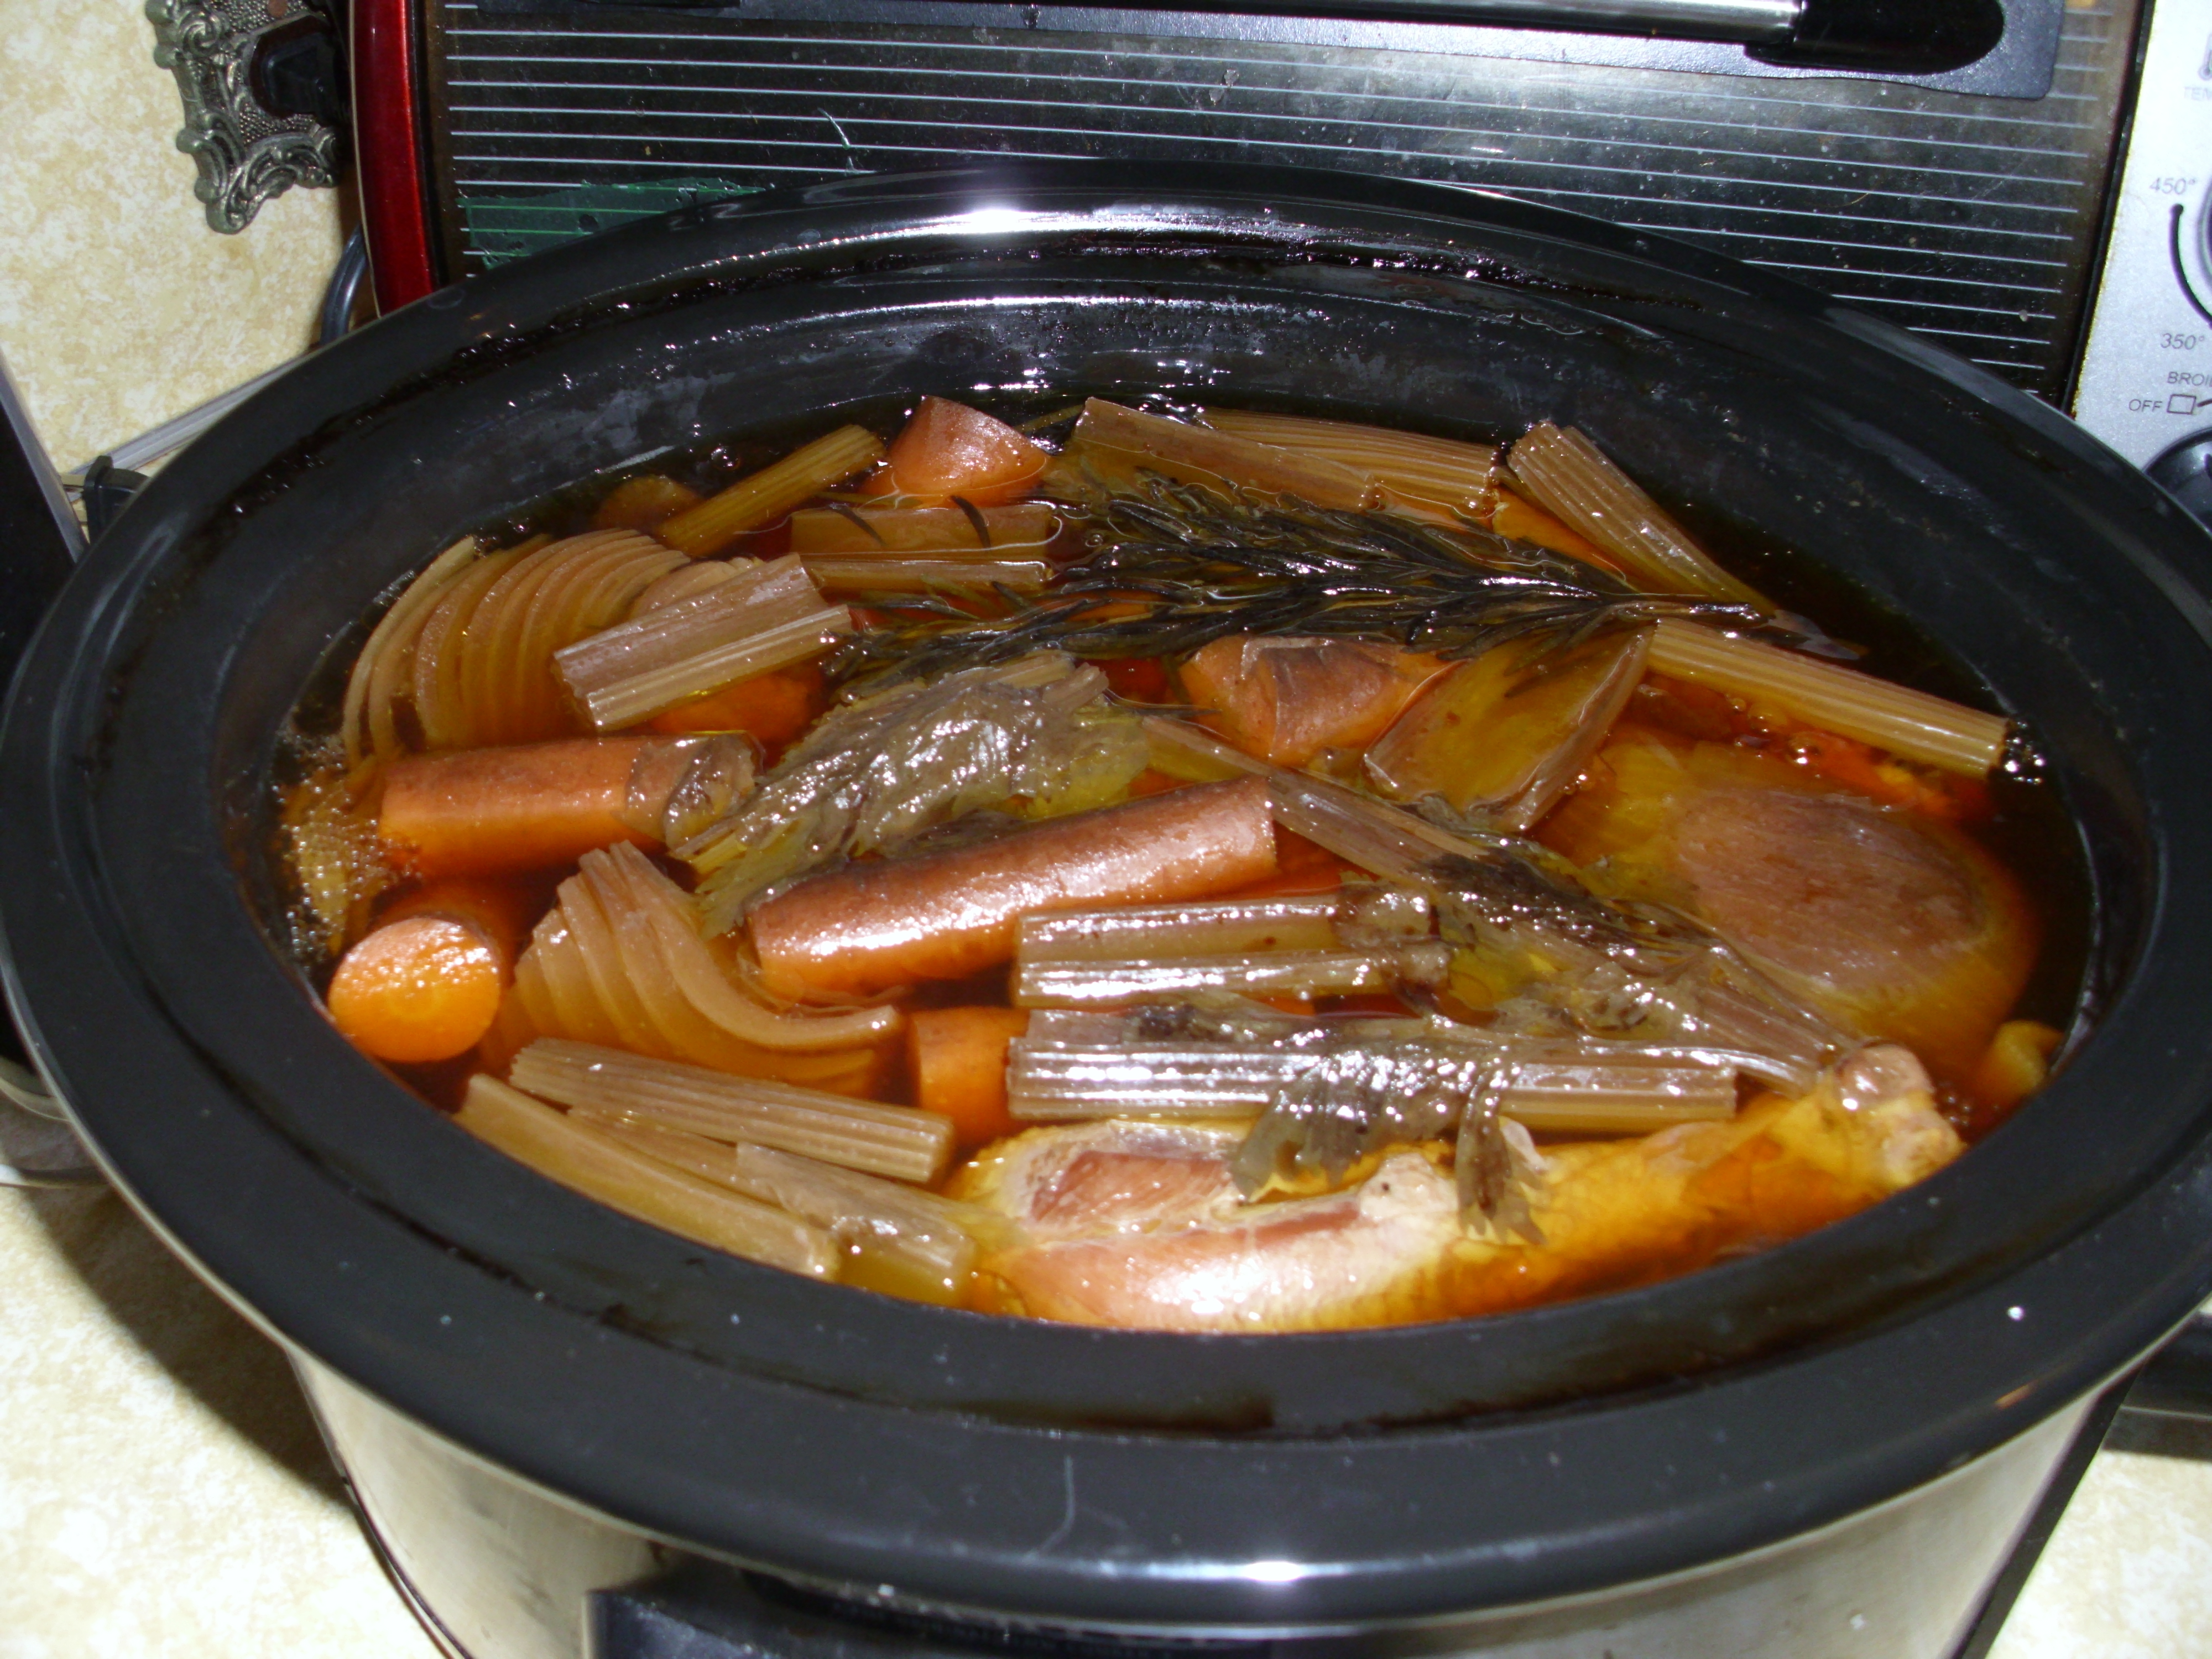
Roughly chop your onions, carrots, and celery and toss it all in the pot as well, along with any fresh herbs you’re using. Fill the pot with water (you want to cover the chicken as much as possible), and add a splash of apple cider vinegar (about 1-2 tablespoons).
Now, put a lid on your slow cooker, and set it to cook on low for as long as possible. For overall cooking time, I recommend a minimum of 18 hours, and no more than 48 hours.
If you have one of the digital slow cookers like I do, this will probably only let you cook it for 10 hours. You’re going to let it cook for that 10 hours, and then you’re going to cook it again for 10 more hours. If you have an older slow cooker that just has heat settings, this is ideal. Just put it on low, make note of what time you started it, and leave it alone for the next 24-ish hours.
If you’re cooking on the stove, after you have everything assembled in your stock pot, you’re going to put a lid on it, and bring it to a boil on the stove (so put it on high and leave it alone for several minutes). Once it’s boiling, turn it down to a low temperature where it still stays simmering and, other than stirring occasionally and checking the liquid level (add water if necessary), leave it alone for the next 24-ish hours.
Bekah, why 24 hours?
I’m so glad you asked!
I’m honestly not completely sure why 24 hours is the magic number, but I do know one thing about making bone broth – the longer it cooks, the better.
It’s pretty much doing magical things while it cooks for a really long time at a really low temperature. All the flavors are melding together, and the vinegar is working to extract the minerals (hello, calcium!) from the chicken bones and put them in the broth where you can consume them.
“I want to gnaw on splintery chicken bones!” said no one ever except the dog.
24-ish hours later…
You should end up with a pot of golden, delicious broth.
Next, you’re going to need a strainer and a second pot.
If you don’t have a fine, mesh strainer, you can use a regular colander. If you wish to filter out fine particulates, just line it with a tea towel, a piece of clean muslin, or a few layers of cheesecloth.
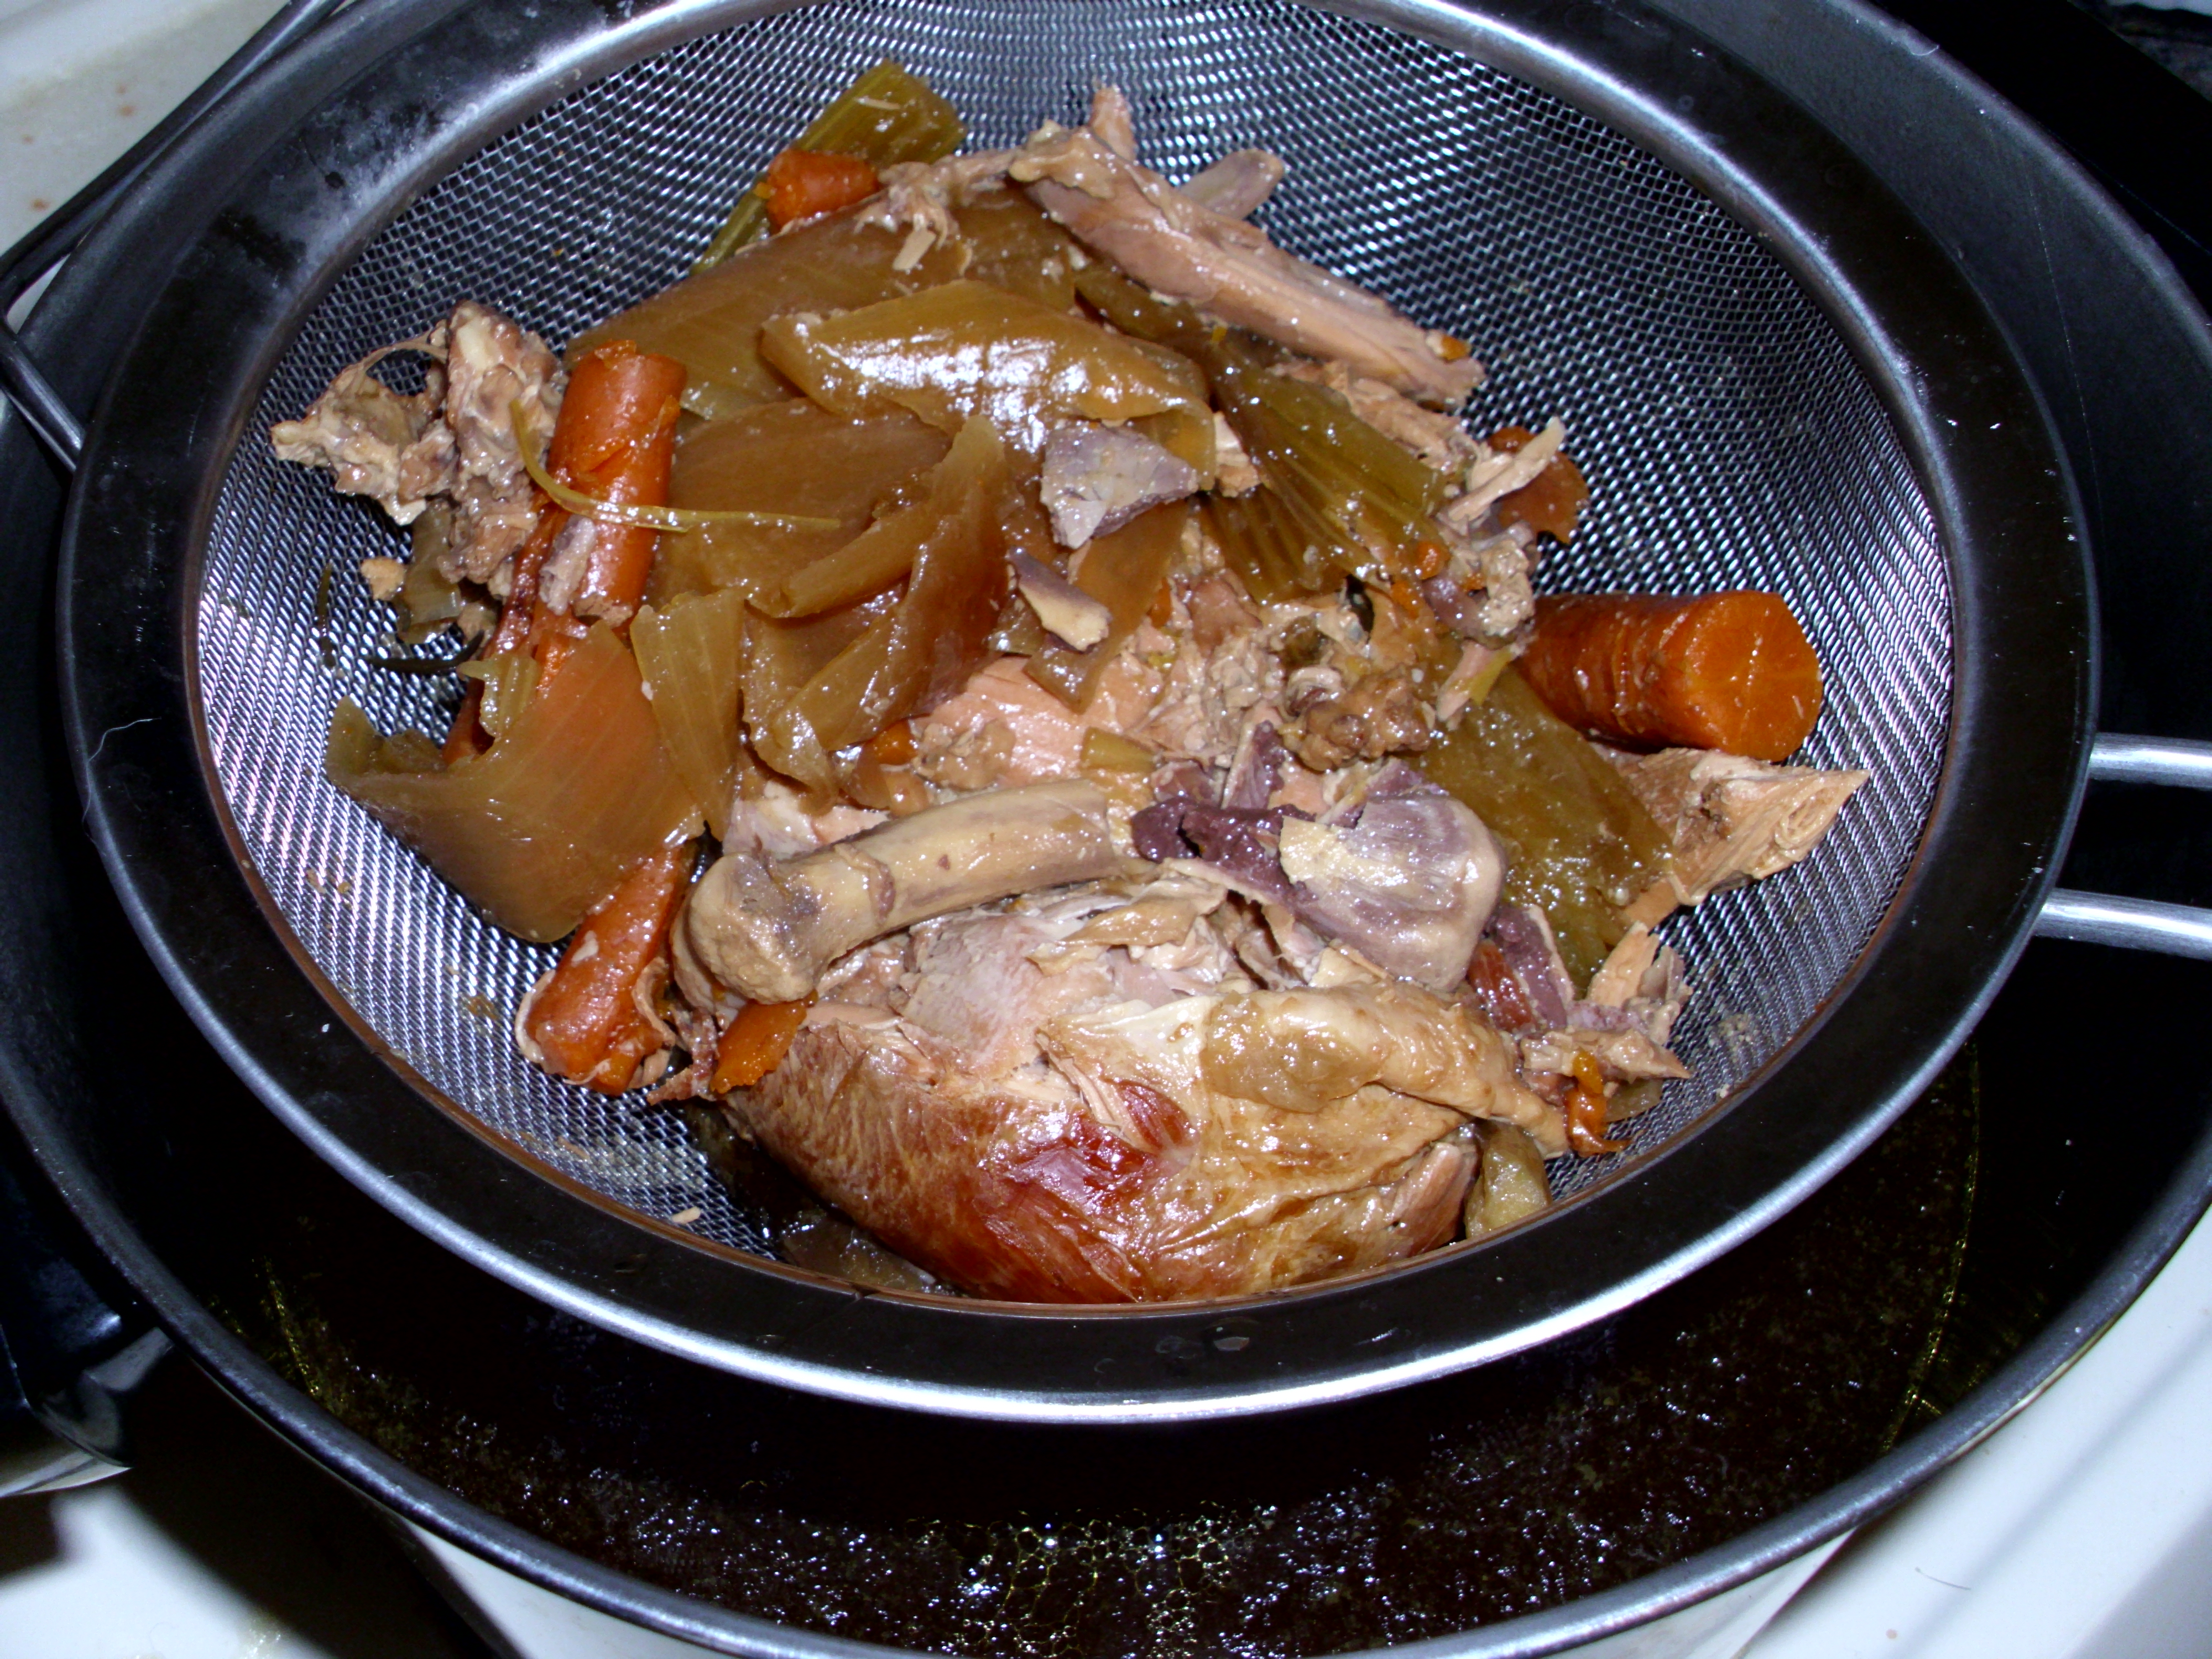
Just scoop as much of the liquid into the strainer as you can, and then when your slow cooker crock or stock pot is cool enough and light enough that you can easily pick it up and pour, you can finish straining it off that way.
If you want to go to the trouble of picking out the bones, you can freeze them to use in later soup (though you’ll want to add new bones, too). I usually just toss it all at this point. If I was better about turning my compost pile, I would put it out there, but the thought of that is laughable. My dog really likes the bits of carrot that have simmered in the broth, though, so he gets at least a couple of those.

All of that shimmery stuff floating on top is fat, and it’s good for you. It will solidify in the refrigerator, but reheating the broth makes it all nice and melty again. Fat is one of the things that makes you full after eating, too.
At this point, you have two options. You can take this broth, and divide it into portions, and freeze or pressure-can it (or refrigerate it for no more than a week) and use it for general cooking in anything that calls for chicken stock or broth. Or, you can continue on to SOUP!
Next, you want to taste your broth. Make sure it’s not too strong for you, and you can thin it with some water if you wish. As you thin it, only do a cup or two of water at a time, and stir it well and taste it often. You don’t want to dilute it too much.
You can also add some salt at this point if you think it needs it.
Then, go ahead and turn on the stove. You want the broth to stay hot if you’re making soup, and it needs to be at a simmer or gentle boil to cook the vegetables and anything else you want to add.
What can I put in the soup?
Whatever you want! I recommend:
- chopped onion
- sliced carrots
- sliced celery
- herbs – approximately 1/2 tablespoon of each kind of herb if dry, or a couple of tablespoons of fresh. I recommend thyme, rosemary, and marjoram, especially if you’re making this because you’re sick. More info on that at the end of the post.
- at least 1 cup of chopped chicken (from the chicken you pulled off the bones before you made the broth)
- and a starch of some sort – noodles/pasta, chopped potatoes, 1/2 cup of rice, or 1/2 cup of barley
In case you don’t know the fast, convenient way to chop an onion, here’s a quick guide:


Once your broth is simmering again, go ahead and add the onion, carrot, and celery. If you’re putting in rice or barley or potatoes, go ahead and add it now too, because that will take at least 30-40 minutes to cook. If you added potatoes, start checking their tenderness at about 20 minutes. They will cook faster or slower dependent on what size you chopped them down to, and if you cook them too long they’ll turn into mush.
Once the carrots are tender, and (if added) the rice or barley is done, you can go ahead and add the herbs, and let the soup continue to simmer for about 10 minutes. The herbs are a more delicate flavor, and if you cook them for too long, they can lose some of that flavor.
Add the chicken, and any pasta you’re including. Cook for about 10 more minutes, or until the pasta is done and the chicken heated through.
Consume!

So about those herbs…
Apparently, some of the things I add to the soup are really good for you, medicinally. I knew they would be, but I didn’t realize how good until I looked up some information about them earlier today. All of the information I found came from herbwisdom.com. Please note, though: I am not a doctor, you should consult your physician, and do your own research as well.
The four best things in this soup for you are:
Marjoram
Marjoram has properties in that make it: antiseptic, antibacterial, anti-fungal, antiviral, and anti-inflammatory. In addition, it also calms upset stomachs, calms anxiety, and reduces phlegm. So if you have a cold or the flu, you DEFINITELY want this herb in your chicken soup.
Onion
Onion is an anti-inflammatory, and it helps to loosen mucus.
Rosemary
Rosemary is antibacterial, antiviral, and an anti-inflammatory.
Thyme
Thyme is one you want to include if you’re having coughing issues with a cold or flu. It is antibacterial and antiseptic, but is also anti-spasmodic (which will help ease coughing) and is, most importantly, an expectorant, so you won’t just be dry coughing.
Rebekah's Homemade Bone Broth Chicken Soup
PHASE 1 – ROAST A CHICKEN
Ingredients
- whole, raw chicken
- olive oil
- salt
Directions
- Preheat your oven to 400 degrees Fahrenheit.
- Remove chicken from package, and check in the body cavity (that hole between the legs that you can see in the picture) and see if you got the goody bag (ie: the innards), and remove it if so.
- Rinse the chicken under cool, running water, making sure to get inside the body cavity. Pat skin dry with paper towels.
- Place on a roasting pan (or a lipped baking sheet with a cooling rack set in it, if you don’t have a roasting pan), belly side up (like in the photo above). Rub skin with olive oil, and sprinkle with salt. Make sure not to get too much salt at this stage.
- Place in oven (if the oven isn’t quite up to temp yet, that’s okay, you can go ahead and slide it in), and roast undisturbed for at least 45 minutes. A meat thermometer placed in the tissue between the drumstick and the thigh should read at least 165 Fahrenheit.
- When done, pull out of oven and let rest for at least 15 minutes before carving.
- Feel free to consume some of the meat from this, but make sure to strip some of the meat off the bones and set it aside in the fridge to put in the soup later.
PHASE 2 – MAKE THE BONE BROTH
Ingredients
- Chicken carcass (bones, skin, any meat still left on the bones)
- Salt, preferably kosher or Pink Himalayan salt.
- 1-2 onions (white or yellow)
- 3-4 whole carrots
- 3-4 ribs of celery
- apple cider vinegar
- water
- optional: fresh herbs. I prefer to use thyme, rosemary, and marjoram to season my broth. Parsley would be okay, too. ( Only if you have them on hand, and make sure to reserve some to use in the soup later.)
Directions
- Next, you want to get your slow cooker or large stock pot out and dump that chicken in there – all of it, except the meat that you pulled off. Do include the neck if you saved that as well.
- Sprinkle the carcass with salt. Liberally.
- Roughly chop your onions, carrots, and celery and toss it all in the pot as well, along with any fresh herbs you’re using.
- Fill the pot with water (you want to cover the chicken as much as possible), and add a splash of apple cider vinegar (about 1-2 tablespoons).
- Now, put a lid on your slow cooker, and set it to cook on low for as long as possible. For overall cooking time, I recommend a minimum of 18 hours, and no more than 48 hours.
- If you’re cooking on the stove, after you have everything assembled in your stock pot, you’re going to put a lid on it, and bring it to a boil on the stove (so put it on high and leave it alone for several minutes). Once it’s boiling, turn it down to a low temperature where it still stays simmering and, other than stirring occasionally and checking the liquid level (add water if necessary), leave it alone for the next 18-24 hours.
- Next, you’re going to need a strainer and a second pot (this one will be used on the stove). If you don’t have a fine, mesh strainer, you can use a regular colander. If you wish to filter out fine particulates, just line it with a tea towel, a piece of clean muslin, or a few layers of cheesecloth.
- Strain your broth, and place it on the stove. You want it to stay warm at this point if you’re going straight into soup assembly, so turn that burner on medium-high.
- Taste your broth. If it’s too strong, thin it with some water – but only a cup or two at a time, and stir thoroughly before you taste it again. If it’s too weak, let it come to a boil for a little while and some of the excess liquid will evaporate. Add some more salt at this point, too, if you think it needs it.
PHASE 3 – ASSEMBLE THE SOUP
Ingredients
- chopped onion
- sliced carrots
- sliced celery
- herbs – approximately 1/2 tablespoon of each kind of herb if dry, or a couple of tablespoons of fresh. I like to use thyme, rosemary, and marjoram.
- at least 1 cup of chopped chicken (from the chicken you pulled off the bones before you made the broth)
- and a starch of some sort – noodles/pasta, chopped potatoes, 1/2 cup of rice, or 1/2 cup of barley
(All of the above are merely suggestions – do what you like with your soup!)
Directions
- Once your broth is simmering again, go ahead and add the onion, carrot, and celery. If you’re putting in rice or barley or potatoes, go ahead and add it now too, because that will take at least 30-40 minutes to cook. If you add potatoes, start checking their tenderness at about 20 minutes. They will cook faster or slower dependent on what size you chopped them down to, and if you cook them too long they’ll turn into mush.
- Once the carrots are tender, and (if added) the rice or barley is done, you can go ahead and add the herbs, and let the soup continue to simmer for about 10 minutes.
- Add the chicken, and any pasta you’re including. Cook for about 10 more minutes, or until the pasta is done and the chicken heated through.
- Consume!

heylookawriterfellow
December 21, 2015 - 8:27 am ·No sprouts, I see! I approve.
Rebekah Loper
December 21, 2015 - 9:01 am ·Not in soup. Brassicas like broccoli/cabbage/Brussels sprouts have a tendency to turn everything bitter when cooked for hours like chicken stock is.
heylookawriterfellow
December 21, 2015 - 10:36 am ·Sprouts turn me bitter, too.